

It gave me so much inspiration... and many of my projects (flower girl buckets, cupcake stands) were taken right from the book and adjusted a little to fit my needs.
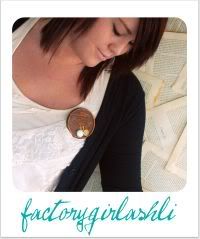
Next I would like to point out that the following photos were taken by Jarnagin Photography. Believe it or not, Brett was one of the first people I got a hold of after my engagement. I had to make sure he was available for June 13. He does travel... so don't think he's only exclusive to Central Illinois. If you are considering him as a photographer, you might want to get a hold of him soon! I hear he's gotten about a thousand requests for June 26 already.
Anyways, why DIY? Because it's fun. It's personal. It's unique. My husband and I planned our whole wedding by ourselves. Well, I mostly planned it and asked for approval... which usual was a simple "whatever you want!" I can't imagine what our wedding would have felt like if a planner had told us what to do. I love every personal touch and detail we created. Yes ladies! My husband even helped make some stuff! Here are some photos and links that help tell the story of the things I made for my wedding.
1. Programs. These were made by buying recycled brown cardstock in 8.5x11 sheets, cutting them into thirds, and doing a lot of other cutting and glueing. I printed all the important info (wedding party, order of ceremony) and simply glued it on. The hearts I cut from the pages of an old novel using a Cricut. They were stamped with two little kissing birdies. I cut rectangles from postcard themed scrapbooking paper and stamped our monogram, "C" in black. Now I'm going to admit that I read it was bad luck to use the married monogram before the ceremony. But did I care? Obviously not. The programs were tied at the corner by ribbon. These, the invitations, and thank you's were accomplished assembly line style with my mom and girlfriends. Total cost? Um, probably about $30 for 150.

2. Card holder at the ceremony. I loved birdcage style card holders. There's an ugly white one at Wal-Mart that you can buy.... but I was in love with this one I found at save-on-crafts.com. I simply propped it open and fastened on a pair of lovebirds I found at Michael's and some silk ranunculus I found at Hobby Lobby, and it looked very elegant! Total cost: about $25.

3. Ring Bearer Pillows & Flower Girl Baskets. The ring bearer pillows were hand sewn by moi from felt. I loved some I saw on Etsy, but I didn't feel like paying around $30 each for a tiny pillow a little boy would be carrying down the aisle at my wedding for thirty seconds, then resting in a box in my basement for the rest of my life. And because I had two ringbearers, that drove the price up to $60 or so. So, I decided to make my own. I sewed this out of felt, added some ribbon, tied on a skeleton key to each... and perfect! Total cost: about $3 each. Instead of flower girl baskets, I did buckets. I bought small tin pails at Michael's for $1 each, painted them, covered them with scrapbooking paper, mod podged the heck out of them... and glued on ribbons, flowers, and more skeleton keys. Because it's difficult to find attractive brown and gold flower petals, I bought these faux leaves. And they were BEAUTIFUL on that ivory aisle runner, let me tell you. Total cost: about $5 each.

4. Reception Centerpieces. The flowers and vases were rented from a florist, but you could easily collect milk glass vases and buy flowers from a local grower. Single stems are easy to arrange! The ceramic birds I collected all over the state from a dollar store, so they were $1 each. I bought the paper doilies at the same store, as well as the brown damask placements (pssst don't tell anyone, but they were actually just pages of printer paper). The gold pillar candles were bought in sets after Christmas. I simple attached a brown ribbon and skeleton key, and perfecto! You can barely see them in the picture, but instead of confetti I bought a lot of old canceled stamps from an antique shop and scattered those on the tables.

5. Favors. This one was easy. I bought 250 seed packets (at ten cents each from the dollar store) and my husband and I printed and glued tags that said "Ashli & Colton June 13, 2009" and "Let these flowers grow with our love. Send a photo or note to our new address......" onto each package. Total cost: 10 cents each.

6. Head Table Place Cards. I bought small white frames from Michael's in the $1 section, cut out "mr." and "mrs." with the Cricut, and glued them onto scrapbooking paper with a skeleton key. Total cost: about $1.50 each. We still have these out, "mr." is on his nightstand, and "mrs." is on mine.

7. The Snacks On the Table. We collected teacups and saucers from antique shops, flea markets, and garage sales. Then we filled them with individually wrapped chocolate mints. They were simply adorable. I know you're thinking, what am I supposed to do with all of those teacups AFTER the wedding? Well, I made them into teacup pincushions and gave them to my grandmothers as Christmas gifts. It was sentimental because it was a gift that had a part in our wedding. I paid around $1-5 for each teacup set.

8. The moment we've all been waiting for..... THE CAKE! Okay, yes, I am a cake decorator... and no, I didn't not make my wedding cake. But I did design it. And I also made the cupcakes. If you're having a hard time spending $4+ a serving for a huge cake, you might want to half cupcakes it like I did. I ordered a cake of 100 servings and baked and decorated 100 cupcakes (with help from my lovely bridesmaid, Sara).

The cake was made by Flour Girl Cakery in Paris, Illinois. To save more money, I picked the cake up instead of having it delivered. I wouldn't suggest doing this if you have no experience driving with a cake. You have to have like a mini van or something that allows you to put the cake between the axels of your vehicle, and you have to drive very slow. I bought the topper off of ebay long before I was even engaged. I saw it, fell in love, and knew that if I didn't buy it right then, I would never see it again. It was from 1947, and it was perfect.

For cupcakes, I found these adorable liners from FancyFlours.com. I also bought some ecru and golden pearls for the decoration off of that heavenly site. The rest of the dragees I bought from an Amish bulk foods store in Arthur, Illinois. I made red velvet with cream cheese frosting and chocolate with chocolate frosting. The stands were made from cakeboards, scrapbooking paper, ribbon, and drinking glasses. The how-to is in that book I mentioned earlier, "The DIY Bride".

And there you have it. And if this blog post wasn't pic heavy enough, here's one of the happy couple:


I love the photo- thanks for the post
ReplyDeleteThis brings back memories.........
ReplyDeleteSuch a great post--definitely feeling inspired!
ReplyDeleteI absolutely love it! The colors are amazing, and I love how you included a skeleton key with almost everything! I love that you bought the topper for your cake before you even got engaged, brave woman! <3
ReplyDeleteGreat post -- DIY and buying stuff used is the best way to have eco wedding and spend less money. There are lots of web sites where you can buy used wedding items -- One of my favs is RecycledBride.com -- http://www.recycledbride.com/
ReplyDelete